https://helpx.adobe.com/experience-manager/kt/platform-repository/using/ssl-wizard-technical-video-use.html
SSL setup in AEM 6.3
Statement : Integration of SSL with AEM 6.3
Pre-requisite:
Step2: Generate Certificate Signing Request(.csr) using private key
Step3: Generate the SSL certificate and sign with the private key, Expiry is set for a year.
Step4: Convert Private Key to DER format- this format is required for the SSL setup in AEM
Pre-requisite:
- JRE 1.8
- AEM 6.3 up and running
Solution :
- Create folder with name SSL, where quickstart.jar file is located
Step1 : Create a private key
D:\AEM 6.3\AEM 6.3 software\ssl>openssl genrsa -aes256 -out
localhostprivate.key
4096
Generating RSA private key, 4096 bit long modulus
................................................................................
...........++
.++
e is 65537 (0x10001)
Enter pass phrase for localhostprivate.key: <enter the password for private key>
Verifying - Enter pass phrase for localhostprivate.key: <
D:\AEM 6.3\AEM 6.3 software\ssl>openssl req -sha256 -new -key
localhostprivate.k
ey -out localhost.csr -subj '/CN=localhost'
Enter pass phrase for localhostprivate.key:
D:\AEM 6.3\AEM 6.3 software\ssl>openssl x509 -req -days 365 -in
localhost.csr -s
ignkey localhostprivate.key -out localhost.crt
Signature ok
subject=/CN=localhost
Getting Private key
Enter pass phrase for localhostprivate.key:
D:\AEM 6.3\AEM 6.3 software\ssl>openssl pkcs8 -topk8 -inform PEM
-outform DER -i
n localhostprivate.key -out localhostprivate.der -nocrypt
Enter pass phrase for localhostprivate.key:
You must see below files under the SSL folder:
Step 5: Go to this console http://localhost:4502/aem/inbox search for configure HTTPS -->click on Open
- Enter the keystore password(one that is created while generating private key) and Trust store password (any new password) -->click on next
- Select private key with .DER format and select .crt for certificate file --> Click on next
- Select the port number : 8443 --> Next
- That's It - Shows the SSL setup successfully completed
- Now click on the Go to HTTPS URL to browse the pages in SSL
Step6 : Check the Validity of SSL certificate in Useradmin console
- Go to https://localhost:8443/libs/granite/security/content/useradmin.html
- Search for ssl-service
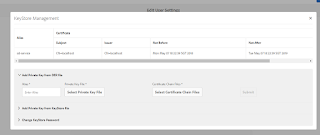
- Open the SSL-service and search for Manage keystore under account settings(https://localhost:8443/libs/granite/security/content/userEditor.html/home/users/system/security/ssl-service)
- Open the Manage Keystore to verify the validity of SSL certificate
- From this manage keystore console can change the keystore password if required in future.
- Open the trust key store console can change the trust key store password if required in future
AEM 6.2 Screens
Statement-
Solution: Steps to create new AEM screem Project and Device registration.
Click on Assign display
Solution: Steps to create new AEM screem Project and Device registration.
- http://localhost:8080/screens.html/content/screens --> click on create
- Select screen template -->click on Next
- Select Master Pages(applications, channels, devices & locations) , enter project title and name -->click on create
- Create Sample Project
Steps to create a channels
- Navigate to Sampleproject -->Select Channels -->click on create
- select Sequence channel -->Next
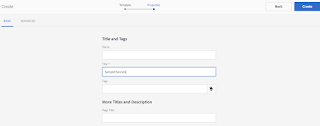
- Enter the title : SampleChannels --> click on Create
- Now Sequence channel has been created under the channels.
Steps to author content for the Sequence Channel
Steps to create Location:
- Navigate to sample Project --> Select Locations folder --> click on create
- Now location page has been created
Steps to add the display to the locations
- Select the Display Template --> Click on Next
- Now Display page has been created.
Steps to assign the Channels to the Display created in the above steps
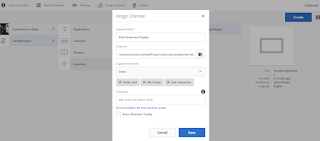
- Navigate to the SampleProject/locations/samplelocations --> Select SampleSingleDispaly -->click on Assign channel
- Enter the Channel role(some description), Channel created in the above steps , Support events(intial load ..etc) --> click on save
Steps to Install the AEM screen Palyer:
- Download AEM screenpalyer for desktop/laptop/mobile or for chrome browser and install it.
Steps to Register the Device for AEM Screens Display
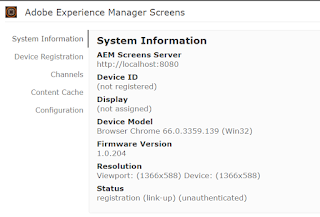
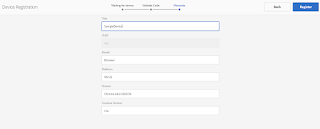
- Here it shows the Device in which AEM screen player was installed --> click on the Device registration -->
- Select the Device and click on Register device
- Now it will generate unique ID for that device in to Validate --> click on validate
- Enter the device display name and click on Register, That's it
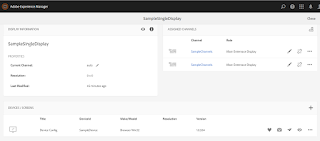
- Finally assign this Device to Display -i.e SampleSingleDisplay created under locations. follow the steps to configure as shown in below screenshots.
- Browse to the path to select the samplecahnnel.
- Assign the Channels - SampleChannels that was created
- Finally click on assign and then Finish - it will display the Device assigned to Display details as shown below. That's it.
Last but not least click on the preview icon of device to see the channel content for registered device.
Note:
Troubleshooting and Device monitoring Reference URL.https://helpx.adobe.com/experience-manager/6-3/sites/administering/using/monitoring-screens.html
Introduction to AEM screens :
https://helpx.adobe.com/experience-manager/kt/eseminars/gems/aem-introduction-to-aem-screens.html
Screen concepts :
https://helpx.adobe.com/experience-manager/6-2/sites/administering/using/screens.html
Deploying screens:
https://helpx.adobe.com/experience-manager/6-2/sites/deploying/using/screens.html
Subscribe to:
Comments (Atom)


