AEM Integrating with Silverpop Engage


Solution : AEM with Silverpop integration

Pre-requisite:
Note:
Silverpop integration is not available out of the box. You must download the Silverpop integration package from Package Share and install it on your instance. After you have installed the package

The integration provides you with the following features:
  • The ability to create/manage/ Emails in AEM and publish them to Silverpop for distribution.
  • The ability to set action of a AEM form to create an Silverpop subscriber.
Publishing Newsletters to an Email Service.
After Silverpop Engage is configured, you can publish newsletters or emails to Silverpop Engage. See Publishing Newsletters to an Email Service.

Silverpop configurations can be added via 
1. Cloudservices
2. Tools, or 
3. API end points. All methods are described in this section.


1. Configuring Silverpop via Cloudservices


To create a Silverpop configuration in Cloud Services:
    • In AEM, tap or click Tools > Deployment Cloud Services. (Or directly access at http://:/etc/cloudservices.html.)

    • Under third-party services, click Silverop Engage and then Configure. The Silverpop configuration window opens.

    • Enter a title and optionally, a name and click Create. The Silverpop Settings configuration window opens.
    • Enter the username, password and select an API endpoint from the dropdown list.

      • Click Connect to Silverpop. When you have successfully connected you see a success dialog. Click OK to exit the window. You can go to Silverpop by clicking Go to Silverpop Engage

      • Silverpop has been configured. You can edit the configuration by clicking Edit


      • Additionally, Silverpop Engage framework can be configured for personalized actions by providing title and name (optional). Click Create will successfully create the framework for the already configured Silverpop connection.
      • Imported data extension columns can later be used through the AEM component - Text and Personalization.


      2. Configuring Silverpop via Tools


      • To create a Silverpop configuration in Tools:


      1. In AEM, tap or click Tools Deployment > Cloud Services. Or navigate there directly by going to http://:/misadmin#/etc.
      • Select Tools, then Cloud Services Configurations, then Silverpop Engage.

      • Click New to open the Create Page window.
      chlimage_1
        • Enter the Title and optionally the Name, and click Create.

        • Enter the configuration information as outlined in step 4 in the previous procedure. Follow that procedure to finish configuring Silverpop.


         Adding multiple configurations


        • To add multiple configurations:


        1. On the welcome page, click Cloud Services and click Silverpop Engage. Click on Show Configurations button which appears if one or more Silverpop configurations is available. All available configurations are listed.
        • Click the + sign next to Available configurations. This opens the Create Configurations window. Follow the previous configuration procedure to create a new configuration.


        3. Configuring API end points for connecting to Silverpop


        • Currently, AEM has six unsecured end points (Engage 1 to 6). Silverpop now provides two new end points as well as changed connection end points for the existing ones.
        • To configure the API end points :


        1. Go to /libs/mcm/silverpop/components/silverpoppage/dialog/items/general/items/apiendpoint/options node on http://:/crxde.
        • Right-click and select Create, then Create Node.

        • Enter the Name as sp-e0 and choose Type as cq:Widget.


        • Add two properties to the newly added node:
        1. NametextTypeStringValueEngage 0
        2. NamevalueTypeStringValuehttps://api0.silverpop.com

        chlimage_1

        • Click on "Save All" button.


        • Create one more node with Name as sp-e7 and Type as cq:Widget.
        •    Add two properties to the newly added node:

        1. NametextTypeStringValuePilot
        2. NamevalueTypeStringValuehttps://apipilot.silverpop.com/XMLAPI


        1. To change the existing API End points (Engage 1 to 6), click each of them one-by-one and replace the values as follows:

           Node Name Exisiting End Point Value New End Point Value
          sp-e1http://api.engage1.silverpop.com/XMLAPIhttps://api1.silverpop.com
          sp-e2http://api.engage2.silverpop.com/XMLAPIhttps://api2.silverpop.com
          sp-e3http://api.engage3.silverpop.com/XMLAPIhttps://api3.silverpop.com
          sp-e4http://api.engage4.silverpop.com/XMLAPIhttps://api4.silverpop.com
          sp-e5http://api.engage5.silverpop.com/XMLAPIhttps://api5.silverpop.com
          sp-e6http://api.pilot.silverpop.com/XMLAPIhttps://api6.silverpop.com
        • Click Save All. AEM is now ready to connect to Silverpop over secured end points.
        chlimage_1

        Installing Hybris

        Solution:

        Hybris Installation
        Follow below instruction to insall Hybris environment.
        1. Download JDk 8 from here
        • Accept licence terms and conitions.
        • Download as per your windows bit (32 or 64)
        • Once downloaded, install jdk by double clicking it. Follow the default instructions by clicking next.
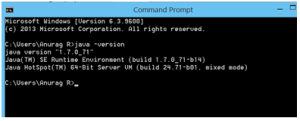
        • Once installed, you should can verify installation in command prompt.
        • setant
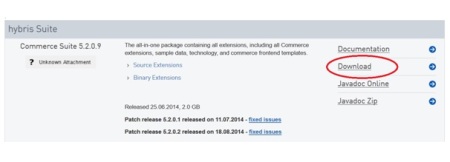
        • Download the Hybris  from here.
        • hybris downlaod
          1. Unzip the downloaded zip file to any location in your computer (other than C).
          2. Go inside the folder hybris>bin>platform
          3. Set environment for Ant. (.bat file for windows and .sh for Linux)
          setantenv
          setantenv2
          1. Run ant clean all
          setantenv3
          It will ask for config folder and template, just press enter for default development environment setup.
          If you get below error then check ur java version. Hybris 6 supports Java 8.
          java.lang.UnsupportedClassVersionError: de/hybris/ant/taskdefs/DbDriverValidator :
           Unsupported major.minor version 52.0
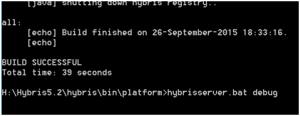
          1. Start Hybris server using command (.bat file for windows and .sh for Linux) in screenshot after you see a build successful message.
          serverstart
          It will take some time to start the server. Ideally 10 minutes.
          1. You will see a message syaing, Server startup in ***** ms
          serverstart2
          1. Hit http://localhost:9001 from your browser.
          2. Access the above url
            make sure Toggle all checkbox is selected.
            click on initialize button and confirm the initialization
          3. This will take considerable amount of time based on the system memory and processor as it creates new DB schema, tables and loads the configured data.
            Wait till the initialization gets finished as shown in below image.
          4. Click on continue to login page.
          hac

          If you see above screen, you have successfully installed the Hybris software in your local system. 

        DTM Workflow ,User and Groups management

        People Workflow & Governance: Another important concept is establishing a user workflow. Thoughtfully assigning user roles provides governance to the DTM workflow.
        User RoleCreate RulesEdit RulesTest RulesApprove RulesPublish RulesCreate/Edit UsersCreate Property
        UserYesYesYes
        ApproverYesYesYesYes
        PublisherYesYesYesYes
        Approver and PublisherYesYesYesYesYes
        AdminYesYesYesYesYesYesYes